
- 1 1. What Is the Ubuntu Terminal? (Basics)
- 2 2. How to Open the Terminal
- 3 3. How to Use Basic Commands (Beginner-Friendly)
- 4 4. Boost Efficiency: Useful Shortcuts & Tips
- 4.1 4.1 Copy & Paste (The First Thing You Should Learn)
- 4.2 4.2 Stop a Running Command (Ctrl + C)
- 4.3 4.3 Recall Previous Commands (History)
- 4.4 4.4 Auto-Complete with Tab (Reduce Mistypes)
- 4.5 4.5 Faster Line Navigation and Editing Shortcuts
- 4.6 4.6 Clear the Screen When It Gets Messy (clear)
- 4.7 4.7 A Handy Trick: “That Command Needed sudo…”
- 5 5. Advanced Techniques (Intermediate Level)
- 6 6. Troubleshooting (Common Beginner Pitfalls)
- 7 7. Frequently Asked Questions (FAQ)
- 8 8. Summary
1. What Is the Ubuntu Terminal? (Basics)
In Ubuntu, the “Terminal” is an application that lets you control your PC by typing text commands. While GUI (Graphical User Interface) operations are done by clicking buttons on the screen, the Terminal corresponds to CLI (Command Line Interface) or CUI (text-based interface) style operations.
At first, many people feel like it’s “a scary black screen” or wonder “what am I supposed to type?” But once you can use the Terminal, what you can do in Ubuntu expands dramatically. That’s because tasks like installing apps, organizing files, checking system status, changing settings, and investigating issues often become fastest and easiest in the Terminal—for many “deeper” Ubuntu tasks, the Terminal is the shortest route.
In this section, we’ll break down the role of the Terminal and the basics of the “shell” commonly used in Ubuntu (such as bash) in a beginner-friendly way.
1.1 The Role of the Terminal (How It Differs from the GUI)
The biggest advantage of the Terminal is that you can give precise instructions as text. GUI operations are intuitive and convenient, but the actual steps can be hidden behind screens and menus. In contrast, the Terminal leaves a visible trail of what you did as commands, which makes the same operation easy to reproduce.
Key benefits include:
- Accurate, repeatable work
For example, if you want to “apply the same settings to another PC,” GUI steps can become vague. With the Terminal, you can simply run the same commands again. - Fast (once you get used to it, much faster)
In many cases, it’s quicker to run a single command than to search menus and click through multiple screens. - Better for troubleshooting
When investigating errors, you often need to check logs and system state. A lot of Ubuntu system information is easy to inspect from the Terminal, and solutions are frequently presented as command-based steps. - Directly useful for servers and development
Servers often run without a GUI. In development, tools like Git and Docker are commonly used from the Terminal, so it’s an area that’s hard to avoid.
That said, you don’t need to do everything in the Terminal. For beginners, it’s most realistic to aim for being able to use it “when you need it”. Starting with basics like “open the Terminal,” “check where you are,” “move between folders,” and “look up what a command means” is more than enough.
1.2 Quickly Understanding “Command,” “Shell,” and “Terminal”
There are a few terms beginners often mix up. The simplest way to think about them is:
- Terminal: the “app/window” you type into
- Shell: the “interpreter” running inside the Terminal (it reads what you type and executes it)
- Command: the “instruction” you type (for example,
lsorcd)
An easy mental model is: the Terminal is the “entrance,” the shell is the “receptionist,” and commands are your “requests.”
1.3 What Is Ubuntu’s Default Shell (bash)?
In Ubuntu, bash (Bourne Again SHell) has long been one of the most commonly used shells. A shell reads the text you type, calls the necessary programs, and prints the results.
For example, when you type ls, the shell asks the OS to “run the command named ls,” and you see a list of files as the output. It may feel like you are typing into a “window (Terminal),” but the “inside (the shell)” is what actually interprets and runs your input.
These days, some people use other shells like zsh, but for beginners, learning with bash is perfectly fine. Many tutorials and troubleshooting guides assume bash, which keeps your learning curve low.
1.4 How to Read the Terminal Screen (Prompt)
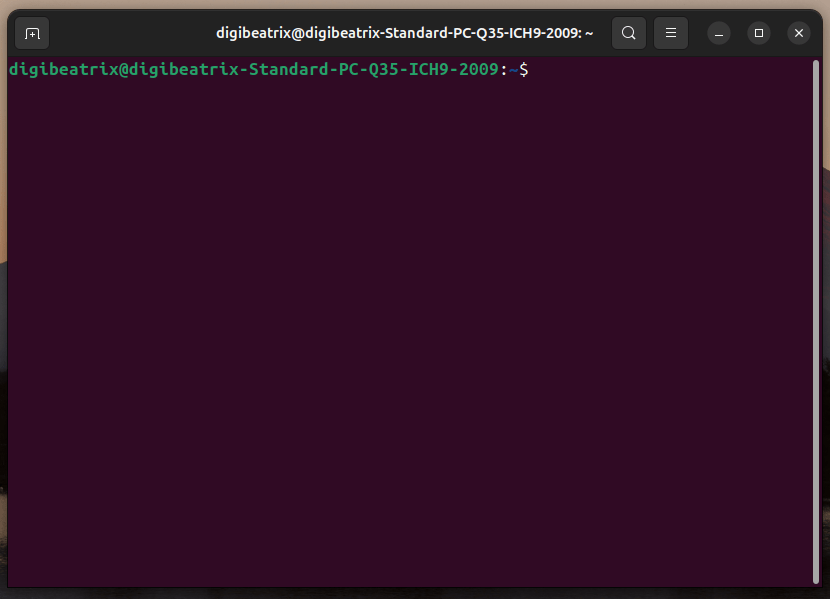
When you open the Terminal, you’ll see something like the following (it varies slightly depending on your environment):
username@pcname:current-location$
You type commands right before the final symbol (like $ or #) and press Enter to run them.
$: a regular user (normal operations)#: administrator privileges (root)
As a beginner, you’ll usually work in the $ state. Operations that show # (root) can significantly affect the system, so it’s fine to handle them carefully only when you actually need to.
Also, the “current location” shown after : matters a lot. In the Terminal, results often depend on which folder you are currently in. In the next sections, learning pwd (print current directory) and cd (change directory) will make your work far more stable.
2. How to Open the Terminal
To use the Terminal in Ubuntu, the first step is simply launching it.
This is where many beginners stumble at first, but it’s actually very simple.
There are several ways to open the Terminal. It’s useful to know more than one method, so here are the most common options.
2.1 Open from the Applications Menu (Recommended for Beginners)
Click “Show Applications” (usually at the bottom-left or along the left side of the screen), then type the following into the search box:
terminal- Or in a Japanese environment:
ターミナル
Click “Terminal” (sometimes shown as “端末 (Terminal)”) to launch it.
This method is the safest for beginners because it’s easy to find even if you’re not sure where the Terminal is.
2.2 Open with a Keyboard Shortcut (Fastest Option)
Ubuntu provides a shortcut to open the Terminal instantly:
- Ctrl + Alt + T
This is extremely convenient. The more often you use the Terminal, the more time it saves.
Many people simply memorize: “I always open the Terminal with this key combo.”
2.3 Open from the Right-Click Menu (Great for Folder Work)
When working with files, you may want to “open a Terminal in this folder.”
In the file manager (Files), open the folder you want, then right-click an empty area inside the folder view.
Depending on your environment, you may see options like:
- 「この場所で端末を開く」
- “Open in Terminal”
If you can use this, you can start working in that folder immediately without typing cd to move there—small, but very convenient.
*If it doesn’t appear in the right-click menu, it may be possible to add it through settings or extensions. However, for beginners, memorizing the shortcut (Ctrl + Alt + T) is usually enough.*
2.4 What to Check First After Opening the Terminal (Beginner Safety Step)
Once the Terminal is open, it’s a good habit to confirm “where you are” before doing anything else.
Type the following command and press Enter:
pwd
This command prints your current location (current directory).
In many cases, you’ll see something like this:
/home/username
This location is commonly called your home directory.
It’s a great starting point for beginners when learning Terminal operations.
3. How to Use Basic Commands (Beginner-Friendly)
When learning the Ubuntu Terminal, you don’t need to memorize everything from the start.
In fact, it’s faster and safer to focus on “the few commands you use most often” and make sure you can use them confidently.
In this section, we’ll introduce essential beginner commands by purpose.
3.1 Check Files and Folders (ls)
To see “what exists in the current location,” use ls.
lsWhen you run it, you’ll see a list of files and folders.
It’s also useful to remember these two common options:
ls -l- Detailed view (shows size, modified time, permissions, and more)
ls -a- Includes hidden files (files that start with
.)
As a beginner, being able to use ls and ls -l is a solid start.
3.2 Confirm Your Current Location (pwd)
You’ve seen it already, but pwd is especially important because it’s easy to get “lost” in Terminal work.
pwdThis command lets you confirm “which folder you are currently in” at any time.
3.3 Move Between Folders (cd)
To move to a different folder, use cd.
cd folder-nameExample: to move into the Downloads folder
cd DownloadsA reliable basic flow to confirm the move is:
pwd
ls
Here are a few cd patterns you’ll use often:
3.3.1 Go Back to Home
cdor
cd ~3.3.2 Go Up One Level
cd ..A common beginner issue is “thinking you moved, but you didn’t.”
To avoid accidents, build the habit of running pwd after cd.
3.4 Create a Folder (mkdir)
To create a new folder, use mkdir.
mkdir test-folderTo confirm it was created, use ls:
ls3.5 Delete Files (rm) *Use With Caution*
To delete a file in the Terminal, use rm.
rm filenameThis is one of the most important safety points for beginners.
- Unlike a GUI trash bin, there is often no easy “undo”
- If you make a mistake, it may be permanently deleted
So early on, it’s totally fine to focus more on “viewing and confirming” than deleting.
To delete a folder, you typically need -r:
rm -r folder-nameAs a beginner, treat delete commands carefully. If you’re not sure, it’s safer not to run them.
3.6 View File Contents (cat / less)
There are a few ways to display what’s inside a file.
3.6.1 Show Everything at Once (cat)
For short files, cat is convenient:
cat filename3.6.2 Read While Scrolling (less)
For long files, less is safer and easier to use:
less filenameBasic less controls:
Enter: move down one lineSpace: move down one pageq: quit
For many beginners, less feels more comfortable than cat.
3.7 Run Commands with Admin Privileges (sudo)
In Ubuntu, operations that affect the system require administrator privileges.
That’s when you use sudo.
Example: update package information
sudo apt updateAfter running it, you may be asked for your password.
An important detail: while typing your password, nothing appears on the screen.
(It can look like you aren’t typing, but you are.)
Type it and press Enter to proceed.
sudo is powerful, so beginners should follow these safety rules:
- Don’t run
sudocommands you don’t understand - Even when copying and pasting, check what the command does
- Be extra careful with delete/overwrite operations
At this point, you can handle the core Terminal flow (open → check location → list → move → view).
Next, we’ll cover shortcuts and tips that can dramatically improve your speed and comfort.
4. Boost Efficiency: Useful Shortcuts & Tips
The Ubuntu Terminal is already useful once you know a few basic commands—but your speed and comfort can change a lot depending on whether you know the right shortcuts and small tricks.
Especially for beginners, the biggest hurdle often isn’t the commands themselves, but “operation stress,” such as:
- Copy/paste doesn’t work the way you expect
- You mistype commands and have to redo them frequently
- You get tired of retyping the same commands over and over
Here are the most practical Terminal features to learn first, ordered by usefulness.
4.1 Copy & Paste (The First Thing You Should Learn)
In the Ubuntu Terminal, Ctrl + C / Ctrl + V may not work the same way as in regular apps.
That’s because Ctrl + C in the Terminal usually means “stop the running process,” not “copy.”
So the standard copy/paste shortcuts in the Terminal are:
- Copy: Ctrl + Shift + C
- Paste: Ctrl + Shift + V
This is one of the most common beginner stumbling blocks, so just memorizing this will make the Terminal feel much easier.
4.2 Stop a Running Command (Ctrl + C)
As mentioned above, Ctrl + C is extremely important in the Terminal.
If you run a command and it doesn’t stop, Ctrl + C can interrupt it.
For example, if you accidentally start something that keeps running, press:
- Ctrl + C
The process stops, and the Terminal returns to the input prompt.
If you think “the Terminal froze,” it may just be working. When in doubt, try Ctrl + C first.
4.3 Recall Previous Commands (History)
The Terminal keeps a history of commands you’ve run.
This helps you avoid retyping the same commands.
- Up arrow: previous command
- Down arrow: next command
For example, you don’t need to type sudo apt update every time—press the up arrow and hit Enter.
4.3.1 View History with the history Command
If you want to see a full list, use history:
historyEach entry has a number, so you can rerun a specific command by number.
Example: run history item 120
!120As a beginner, simply remembering the up arrow is already a big win.
4.4 Auto-Complete with Tab (Reduce Mistypes)
Typos in the Terminal are one of the biggest sources of beginner frustration.
A powerful way to prevent them is Tab auto-completion.
For example, to move to the Downloads folder, you don’t need to type the whole name:
cd DownNow press Tab, and the rest may be completed automatically:
cd DownloadsIf there are multiple matches, press Tab twice to display a list of options.
Tab completion helps because:
- You type less
- Spelling mistakes drop dramatically
- You avoid typing names that don’t actually exist
If you’re not comfortable with the Terminal, using Tab aggressively is one of the best habits you can build.
4.5 Faster Line Navigation and Editing Shortcuts
When typing long commands, moving the cursor can become annoying.
These shortcuts help a lot:
- Ctrl + A: move to the beginning of the line
- Ctrl + E: move to the end of the line
For example, if you want to fix only the beginning of a command, Ctrl + A jumps you there instantly.
If you want to delete by word instead of one character at a time, this is useful:
- Ctrl + W: delete one “word” to the left of the cursor
It makes correcting mistakes much faster once you get used to it.
4.6 Clear the Screen When It Gets Messy (clear)
After working for a while, the output can get cluttered and hard to read.
In that case, clear the screen:
clearThe display becomes clean again, making it easier to focus on what you’re doing now.

4.7 A Handy Trick: “That Command Needed sudo…”
This is a very common beginner situation:
- You typed a command
- You got an error
- It said you don’t have permission
Retyping everything can be annoying.
In that case, you can rerun the previous command with sudo like this:
sudo !!This means “run the previous command with sudo.”
However, it’s powerful, so keep these warnings in mind:
- If the previous command was dangerous, running it with sudo can make the damage much worse
- Never use it when you’re not sure what the previous command was
As a beginner, it’s best to use this only after you fully understand what it does
5. Advanced Techniques (Intermediate Level)
From here, we’ll move beyond “using the Terminal” and introduce intermediate techniques that help you work more efficiently.
That said, you don’t need to feel overwhelmed.
Even just knowing “this is possible” can be extremely useful later.
5.1 Look Up How to Use Commands (man / –help)
When you get stuck in the Terminal, searching the web is helpful—but Ubuntu also includes built-in ways to look things up on your own.
5.1.1 Read Manuals with man
man lsThis displays the manual page (documentation) for the ls command.
- Press
qto quit - Search inside the manual with
/keyword(example:/sort)
Manual pages can feel dense at first, but once you get used to them, they’re incredibly powerful.
5.1.2 Quick Help with –help
If you want a lighter, faster overview, use --help:
ls --helpThis lets you quickly check “what the command can do.”
5.2 Connect Commands with a Pipe (|)
One of the Terminal’s greatest strengths is that you can combine commands.
A classic example is the pipe (|).
A pipe sends the output of one command into another command as input.
Example: from a file list, show only items that contain the word “log”
ls | grep logThis filters the list instantly.
As a beginner, it’s enough to remember: “I can filter output like this.”
5.3 Save Output to a File with Redirection (> / >>)
Sometimes you want to save Terminal output into a file.
That’s what redirection is for.
5.3.1 Overwrite Save (>)
ls > filelist.txtThis saves the output of ls into filelist.txt.
5.3.2 Append Save (>>)
echo "hello" >> memo.txtThis appends the text to an existing file instead of overwriting it.
This is useful for saving logs and keeping simple work notes.
5.4 Environment Variables and Config Files (Know the Minimum)
When working in the Ubuntu Terminal, you may see terms like:
- Environment variables
- PATH
- .bashrc
You don’t need to fully understand everything as a beginner, but having a simple mental model helps.
5.4.1 What Are Environment Variables?
Environment variables are “settings” that the Terminal and applications refer to.
For example, the environment variable PATH is a list of locations where Ubuntu searches for commands.
To check PATH, use:
echo $PATHWhat you see is a list of folders the system checks when you run a command.
5.4.2 What Is .bashrc?
.bashrc is one of the configuration files that runs when you open a Terminal session.
It’s commonly used to set aliases (shortcuts) and add environment variables.
For example, you can define ll as a shortcut for ls -alF.
However, for beginners, it’s fine to simply know that it exists.
In the next section, we’ll cover common beginner problems and how to handle them. Errors are normal in Terminal work, so don’t be afraid—learn a few patterns and you’ll get comfortable quickly.
6. Troubleshooting (Common Beginner Pitfalls)
The Ubuntu Terminal is powerful, but it’s normal to see errors when you’re just starting.
Instead of thinking of errors as “failures,” it’s more accurate to see them as messages from the OS telling you what’s happening. That mindset makes the Terminal much less scary.
In this section, we’ll walk through common beginner issues and what to do about them.
We’ll focus on “what happened” and “how to fix it,” step by step.
6.1 You See command not found (Command Not Found)
When you run a command, you might see this error:
command not foundThis means “Ubuntu can’t find a command with that name.” The most common causes are these three:
6.1.1 A Typo (Most Common)
The #1 beginner cause is a simple typing mistake.
Example:
slWhen you meant to type ls.
Two habits reduce this dramatically:
- Use Tab completion
- Type commands in small chunks instead of rushing
6.1.2 The Command Isn’t Installed
Some commands are not installed by default in Ubuntu.
If you try to use a specific tool and get command not found, it may simply not be installed yet.
In that case, you need to figure out which package provides the command.
For beginners, the most reliable approach is to search the command name and look for “Ubuntu install” instructions.
6.1.3 PATH Isn’t Set Correctly (More Intermediate)
PATH is the list of places Ubuntu searches when you run a command.
If you installed something but it still can’t be found, PATH may be the issue.
You can check PATH with:
echo $PATHThat said, beginners don’t hit this problem very often.
In most cases, it’s safer to suspect a typo or missing installation first.
6.2 You See Permission denied (Not Enough Permissions)
If you see this:
Permission deniedIt means “you don’t have permission to run this.”
Ubuntu restricts certain operations for safety.
6.2.1 You Needed sudo
System-level operations (installing software, changing settings, etc.) may require sudo.
Example:
apt updateIf that produces a permission error, try:
sudo apt updateIf prompted for a password, type it and press Enter.
6.2.2 The File Isn’t Executable
You may see a permission error when trying to run a script or executable file.
Example:
./script.shIf the file does not have execute permission, you’ll get Permission denied.
To fix it, add execute permission with chmod:
chmod +x script.shThen run it again:
./script.sh*Because chmod changes file permissions, it’s safest for beginners to use it only on files you created yourself.*
6.3 You See No such file or directory (File Doesn’t Exist)
This error appears when the filename or path is incorrect:
No such file or directoryCommon beginner causes include:
- Wrong capitalization in the filename
- Running the command in the wrong folder (you didn’t
cdto the right place) - Typing a name that doesn’t exist
6.3.1 First, Confirm “Where You Are”
To avoid getting lost, run:
pwd6.3.2 Check Whether the File Exists
lsIf the filename is long, use Tab completion to type it accurately.
6.4 The Command Never Ends (It Keeps Running)
Sometimes you run a command and it seems like it never returns to the prompt.
There are many possible causes, but here are beginner-friendly steps to try:
6.4.1 Interrupt with Ctrl + C
Ctrl + CThis often stops the process.
6.4.2 You Can’t Exit less (Press q)
A common beginner trap is less.
If you’re viewing a file and feel stuck, press:
q6.5 You See sudo: unable to resolve host (Hostname Warning)
When running sudo, you might see a message like:
sudo: unable to resolve host ...This warning means “Ubuntu can’t properly resolve the hostname configuration.”
In many cases it’s not fatal—the command still runs—but fixing hostname settings can remove the warning.
Because it may involve editing /etc/hosts and hostname settings, beginners should use a cautious approach:
- If your work continues normally, it’s usually fine to ignore it for now
- If it appears frequently, follow a trusted guide or official steps and fix it carefully
7. Frequently Asked Questions (FAQ)
Here are common questions beginners have when searching for “Ubuntu Terminal.”
Use this as a quick reference or to reinforce parts you didn’t fully absorb while reading.
7.1 Q1. Can beginners use the Ubuntu Terminal?
Yes—beginners can absolutely use it.
You don’t need to do difficult things right away. If you can do these three basics, you’re in great shape:
- Open the Terminal (Ctrl + Alt + T)
- Check your current location (
pwd) - View a file list (
ls)
Once you can do that, you can gradually expand what you’re able to do.
7.2 Q2. Is Terminal work dangerous?
The Terminal itself isn’t “dangerous,” but it can be dangerous if you run the wrong command with strong privileges.
Commands that require special caution include:
- Commands using
sudo - Delete commands like
rm
On the other hand, “view-only” commands are generally safe, such as:
pwdlscatless
As a beginner, practicing with “display and confirm” commands is the safest approach.
7.3 Q3. I can’t copy and paste in the Terminal. What should I do?
Use these shortcuts in the Ubuntu Terminal:
- Copy: Ctrl + Shift + C
- Paste: Ctrl + Shift + V
Remember: Ctrl + C is not “copy”—it’s “stop the running process.”
7.4 Q4. What should I do when I get an error?
Beginners can often solve issues by checking in this order:
- Check for typos
- Confirm your location (
pwd) - Check whether the file exists (
ls) - If it’s a permission error, consider whether
sudois required - If you still don’t know, search the exact error message
Terminal errors often describe the cause in plain text. If you read them calmly, you’ll usually find a hint.
7.5 Q5. What should I learn next to use the Terminal better?
This learning order works well:
- Basic commands (
ls,cd,pwd) - Shortcuts (history, Tab completion, Ctrl + Shift + C/V)
- Help pages (
--help,man) - Pipes and redirection (
|,>,>>)
With just these, you can experience the real usefulness of the Ubuntu Terminal.
8. Summary
The Ubuntu Terminal may look difficult at first, but anyone can learn it by starting with the basics and building up step by step.
Key beginner takeaways include:
- The Terminal is the “entry point” for controlling Ubuntu with text commands
- Avoid getting lost by using
pwd,ls, andcd - Copy/paste (Ctrl + Shift + C/V) and Tab completion make Terminal work much easier
- Errors are messages that help you understand what’s wrong—don’t be afraid of them
Once you can use the Terminal, you’ll work faster in Ubuntu and become stronger at troubleshooting, development, and server operations.
The best shortcut is simply using it a little every day and getting comfortable over time.